We interrupt the usual fibery blog post for this timely tutorial on how to make lavender wands. It's best to make them when the lower flowers just begin to open so the essential oils are at their peak. And, be sure to cut the stems in the morning when you have a few minutes to work on a wand right away, as once they dry out a little they become brittle and difficult to maneuver.
The ingredients needed to make a lavender wand are an uneven number of lavender stems, somewhere between 13 and 19 works best, and three to four ft of 1/4" satin ribbon (I like to use the picot edge type).

I usually purchase a few spools of ribbon when I see them on sale during the year.
Just a note about lavender plants, themselves. Here in the upper Midwest, where we range between zone 4 and 5, I've been able to grow three different cultivars of Lavendula Augustifolia. If you live this far north, it's probably best to give them a little winter protection. Last winter my plants were left to fend for themselves through a brutally cold winter but it also had an early and deep snow cover which helped to keep them insulated.

Shown from left to right are, Munstead, Hidcote, and Jean Davis. The Hidcote is probably the most tender of the three, but has a deeper color and more fragrant flower. My favorite has to be the Jean Davis which is a lovely light pink, not white as it appears in the photo. Plants need to be grown in full sun (at least, up here) in order to produce blossoms.
After you've cut the stems, strip off any lower leaves and lay them out so that the lower flowers start at about the same place. You want the stems to be about the same length but it won't make much if they're an inch or so different from each other.

These are some extraordinarily long Hidcote stems.
Now, gather the stems up in your hand the same way you had them laid out before you.

If you have any of those tiny rubber bands that kids use when they have braces (do they still use those? or am I dating myself), it's great to slide one up the stems. It helps to keep everything snug as the lavender shrinks up as it dries.

My supply of rubber bands is gone, so now I just proceed with the next step. Tie the ribbon around the bundle and try to hide the end in the middle of the flowers.
Tip the whole thing over so that you're holding onto the flowers and gently bend the stems down. If they're freshly cut, they shouldn't break off.

Then, you'll begin weaving.

Over, under, over, under. On the first rnd, I keep the
over stems
underneath my thumb so I'm sure to know they're place is taken. Otherwise, they tend to flop from side to side and things can get a little untidy.
After the second rnd of weaving, all the stems are locked in place.

And, round and round you go.

Once you get to below the flowers, just wind the ribbon around the stems. As it dries, you'll need to go back and tighten it up so there's no sense in spending time weaving them. Gather up any flower buds that drop off. They're great to use in an herb mixture for soup.

When finished, you have a nice little lavender wand to tuck in with sweaters, your fiber stash or anywhere you want a nice lavender scent.

Next week, it's back to the regularly scheduled fiber post.
 Last weekend, my friend Roberta came up for a visit. We had both been wait listed for Meg's Knitting Camp, so we decided to have a Fiber Camp of our own.
 You've already seen my Forest Path, DFS and Hawaii Charlotte. But Roberta brought her Douceur et Soie scarf from Victorian Lace Today, her DFS and gorgeous pink Hanami. Her Ravelry ID is Robedia--go check out her projects page for more lovely lace knitting.
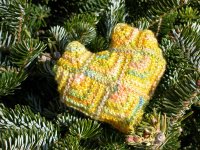
 Some Silk/Cashmere from Jade Sapphire, a skein of Jitterbug, Addi lace needles, Wallaby pattern all fitting nicely into this fun basket from Lantern Moon. Probably would have spent more at knitting camp, but definitely wouldn't have had more fun.